Exploring the Benefits of Dr. Pen Treatments
We’ve all seen the glowing results of clinical facials, but the hefty price tag often keeps professional skin rejuvenation at home feeling like a distant dream. If you have ever noticed your expensive serums just sitting on top of your face without absorbing, traditional topical routines alone simply cannot fix deep texture issues. Dr. Pen bridges this specific gap between costly spa visits and basic daily skincare.
Think of the device’s action like aerating a lawn before fertilizing it. According to skincare experts, creating tiny, controlled micro-channels in the skin’s surface allows your nourishing products to bypass the outer barrier and absorb deeply where they are needed most. This process, the core of dr pen microneedling, uses rapid automated movements to safely stimulate the area without causing harsh damage.
Ultimately, this controlled stimulation tricks your brain into sending targeted repair teams to the surface. By unlocking collagen induction therapy benefits, your body naturally plumps fine lines and smooths scars without requiring surgical downtime. In practice, harnessing this natural healing trigger provides a budget-friendly way to transform your complexion right from your bathroom counter.
Vertical Precision vs. Roller Drag: Why Dr. Pen Outperforms Traditional Derma Rollers
If you’ve debated between microneedling vs derma rolling, you might wonder why motorized devices are the preferred choice. The secret lies in how the needles actually enter your face. Manual rollers puncture the skin at an angle like a spiked wheel, creating a scooping motion. This curved path compromises your skin barrier and causes “track-mark tearing,” leaving tiny V-shaped scratches rather than clean healing channels.
Instead of dragging, a dr.pen operates like a tiny, high-speed sewing machine. The motorized cartridge moves the needles straight up and down in a process called vertical oscillation. Because the needles enter and exit at a perfect 90-degree angle, they stamp precise micro-channels without slicing the surrounding tissue.
Preserving your epidermal integrity—the health of your outermost skin layer—is crucial for a glowing result instead of prolonged redness. This clean vertical entry minimizes unnecessary damage and drastically reduces downtime. Figuring out how to use electric derma pen tools also reveals their advantage around delicate contours like the nose and upper lip, where a bulky manual roller cannot safely fit.
Upgrading to this rapid vertical motion ensures safe collagen stimulation without unwanted scarring. This mechanical advantage allows for precise setting customization across different facial zones.

Matching Needle Depth to Your Skin Goals: A Beginner’s Map for Safe Treatment
Gliding your device over every feature with the exact same setting means you are likely pushing too deep in some spots and not deep enough in others. Think of your face as varying terrain: your forehead skin is stretched thinly over bone, while your cheeks are much fleshier. Safely adjusting needle length for face zones requires keeping the depth shallow on delicate areas, while slightly increasing it for thicker tissues.
Beyond anatomy, your specific skincare goal dictates your depth approach. “Cosmetic needling” uses short settings (under 0.5mm) strictly to boost your everyday glow and help serums absorb into the epidermis. Conversely, “medical needling” reaches deeper to trigger the collagen repair teams necessary for stubborn texture. Use this basic map to safely match depth to your goal:
- Brightening skin tone and product absorption: 0.25mm
- Reducing fine lines with skin needling: 0.25mm to 0.5mm
- The best needle depth for acne scars: 1.0mm to 1.5mm (maximum for home use)
Resist the temptation to go deeper, as over-needling deep tissues at home risks permanent scarring rather than healthy collagen induction. Mastering this facial map ensures a safe and effective treatment, requiring a precise tool to execute it properly.

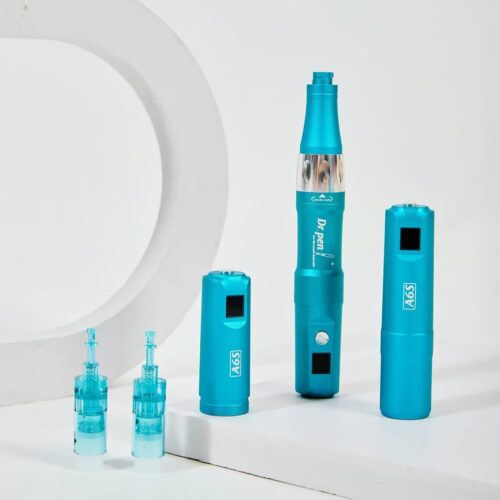
Inside the Dr. Pen M8: Why This Specific Model Leads the At-Home Market
Executing a customized depth map safely requires a reliable device. The dr pen m8 leads the DIY market by prioritizing controlled stimulation. Its upgraded digital motor maintains perfectly stable RPM (revolutions per minute). Think of it like a premium electric toothbrush: if the motor lags, the head drags. A stable motor ensures the needles stamp in and out vertically without tearing the tissue, which is absolutely crucial for minimizing downtime and preventing scarring.
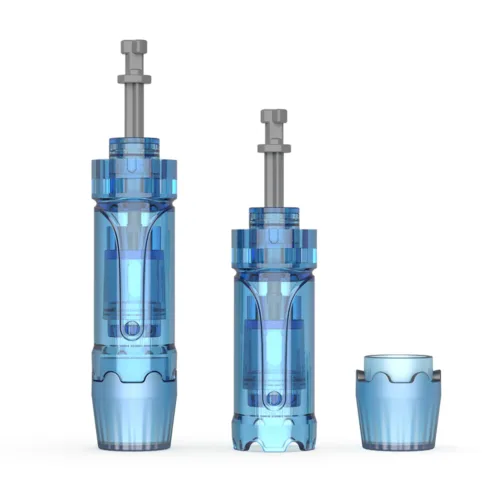
This dr pen microneedling pen also introduces advanced cartridge technology designed specifically for comfort. When checking a replacement needle cartridges guide, you will notice the M8’s unique 16-pin configuration delivers these key technical upgrades:
- Needle Gauge Thickness: Ultra-fine needles create precise micro-channels that trigger the healing response significantly faster than thicker, older alternatives.
- Motor RPM Speeds: Six adjustable digital speeds maintain consistent puncture force across varying skin densities.
- Battery Life Features: A high-capacity wireless battery prevents the motor from dropping speed and painfully snagging mid-treatment.
Packing 16 fine-gauge pins into one cartridge means you achieve maximum collagen induction with noticeably less pain. While premium hardware prevents mechanical skin damage, avoiding breakouts and infection relies entirely on a strict hygiene routine.
The Sterile Setup: How to Sanitize and Prepare Like a Pro
Even premium hardware cannot protect you from cross-contamination if your workspace is dirty. The “Golden Rule” of at-home microneedling device safety is that cartridges are strictly single-use. Although conflicting advice exists online, the dr pen official website explicitly warns against reusing them. Reusing dulls the fine tips and traps invisible bacteria, turning a rejuvenating treatment into an invitation for severe skin infections.
Treat your bathroom counter like a clinical space to prevent staph or acne flares. Master this 5-step pre-treatment protocol:
- Wash your hands thoroughly with antibacterial soap.
- Wipe the pen handle using a 70% isopropyl sanitization pad.
- Double-cleanse your face to strip away all makeup and daily oils.
- Open the sterile cartridge only seconds before attaching it.
- If searching how to sanitize microneedling needles—stop; toss them after one use and sanitize only the pen itself.
Numbing cream requires its own careful removal process before those needles ever touch your face. If any numbing residue remains, the device will drive those surface chemicals deep into your fresh micro-channels, triggering intense irritation. Wipe off the cream completely using a gentle cleanser and a final swipe of alcohol.
A perfectly sterile environment allows for a confident session without the fear of breakouts. After safely creating these precise micro-channels, immediate and proper nourishment maximizes the healing results.
Post-Treatment Recovery: Boosting Collagen with Hyaluronic Acid
Right after you turn off your device, your skin enters a crucial 24-hour “golden window.” Because the fresh micro-channels remain wide open, topical products penetrate up to 300% deeper than usual. This incredible absorption rate makes a pure hyaluronic acid serum after needling your best friend. Think of your face as a thirsty sponge; applying a gentle, fragrance-free hydrating serum floods those open pathways with moisture to soothe pinkness and jumpstart the collagen repair process.
This deep access also creates major red flags regarding your everyday skincare routine. Even if your main goal is treating hyperpigmentation with electric pens, applying active ingredients like Vitamin C, exfoliating acids, or Retinol right now will cause severe damage. Because the skin’s protective surface barrier is temporarily breached, these strong chemicals bypass the top layer and trigger intense burning and inflammation deep in the dermis.
Protecting your newly treated skin requires following a strict 24-hour “dry” rule to prevent clogged channels. You must completely avoid heavy creams, makeup, physical sunscreens, and sweaty workouts for a full day, as these elements easily trap invisible bacteria inside the healing pathways. Managing these basic microneedling side effects and recovery steps ensures a beautiful, glowing result without unwanted breakouts.
Your 6-Week Transformation: Planning Your First Safe Treatment Cycle
Safely harnessing collagen induction from home moves past surface-level serums to trigger real skin renewal. The key to success with your Dr. Pen isn’t aggressive daily use; remember, more is not better. Because your face operates on a natural 4-6 week skin cycle, patience is your most powerful tool.
To avoid over-working your skin, stick to a sustainable frequency of skin needling treatments. Commit to this beginner’s 3-month “marathon, not a sprint” schedule:
- Month 1: One shallow treatment to test tolerance, followed by four weeks of rest and deep hydration.
- Month 2: A second treatment targeting specific concerns, allowing the skin to fully recover.
- Month 3: A third treatment, using “indirect lighting” photography to accurately track your baseline progress.
By respecting this biological timeline, your device transforms from an intimidating tool into an effective resource for permanent scar reduction and skin rejuvenation. Focus on noticeable texture improvement and a brighter tone as your primary success metrics to safely master your own skincare routine.