A good microneedling session should leave your skin looking a little pink, not irritated, inflamed, or damaged. That is the difference between guessing and knowing how to use at home microneedling the right way. When the technique, needle depth, and aftercare are handled correctly, at-home microneedling can support smoother texture, softened acne marks, better product absorption, and more refined-looking skin over time.
Why at-home microneedling works
Microneedling creates controlled micro-injuries in the skin. In response, the skin begins its natural repair process, which can help improve the look of fine lines, uneven texture, enlarged pores, and post-acne marks. It also creates temporary channels that can increase absorption of the right topical formulas.
The key phrase there is the right topical formulas. At-home microneedling is not about using the deepest possible setting or layering on every active in your routine. It is about precision, hygiene, and consistency. Professional-looking results come from safe technique repeated over time, not from doing too much in one session.
How to use at home microneedling step by step
Before you begin, make sure your skin is a good match for treatment that day. If you have an active breakout, sunburn, broken skin, eczema flare, rash, or any sign of infection, wait. Microneedling over compromised skin can make irritation worse and lead to a poor result.
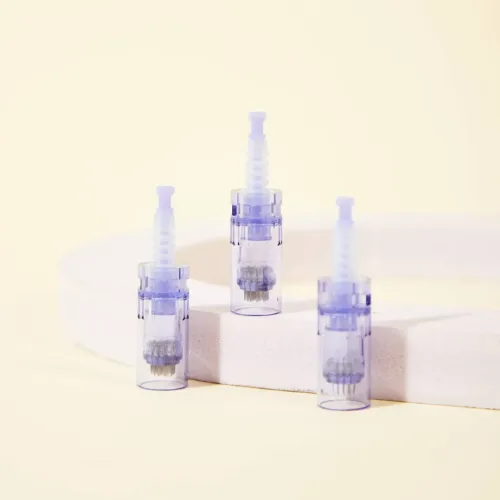
Start by cleansing thoroughly. Remove makeup, sunscreen, oil, and residue so the skin is completely clean. Then sanitize your hands and prepare your device with a new, single-use cartridge. This is one area where cutting corners is never worth it. Fresh, properly handled cartridges help protect skin safety and keep the treatment hygienic.
Next, choose your needle depth carefully. This is where many beginners go wrong. Deeper is not automatically better. For most first-time users, shorter depths are more appropriate, especially on delicate or thinner areas. The forehead and under-eye region generally require a more conservative setting than the cheeks. Thicker, more textured areas may tolerate more depth, but that still needs to be approached gradually.
Once the cartridge is attached and the device is set, apply a simple hydrating glide product if your device protocol calls for one. Avoid aggressive actives before and during treatment. Your skin does not need a cocktail of exfoliating acids or retinoids while it is being needled.
Work in small sections of the face. Keep the skin gently taut and move the device in a controlled pattern without dragging. Most users do best treating one area at a time – for example, forehead first, then cheeks, then chin. You want even coverage, not repeated passes over the same spot until the skin is overly red. Mild pinkness is expected. Intense redness, pinpoint bleeding in a casual home session, or a burning sensation usually means the depth or pressure is too aggressive.
After you finish, remove any remaining treatment fluid and apply a calming, hydrating serum or post-treatment formula. This is the time for gentle support, not strong actives. Think hydration, barrier comfort, and skin recovery.
Getting the needle depth right
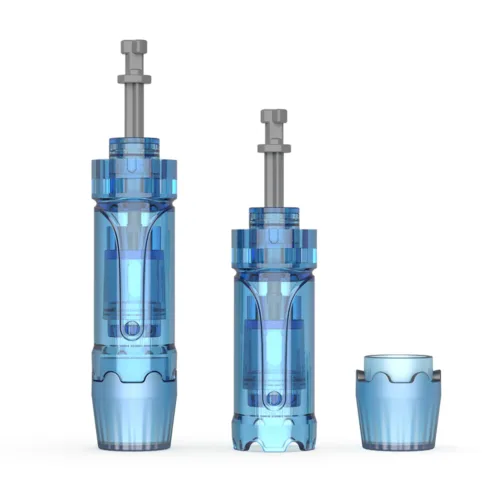
If you are learning how to use at home microneedling, depth control matters as much as device quality. Adjustable depth is one of the biggest advantages of a professional-style microneedling pen because different areas of the face need different settings.
The thinner the skin, the more conservative you should be. Areas around the eyes, near the lips, and across the forehead usually need a lighter approach. Cheeks often tolerate more. If your main concerns are improved glow, smoother texture, and better serum absorption, you do not need to chase extreme depth.
A good rule is to start lower than you think and build based on your skin response. If your skin recovers well, shows no unusual irritation, and you are treating a concern like acne scarring or rough texture, you can increase gradually over future sessions. If your skin stays red for too long or feels sensitized for days, scale back.
What to put on your skin – and what to avoid
Microneedling increases product penetration, which is exactly why product choice matters so much. During and immediately after treatment, use only skin-friendly, non-irritating formulas designed for post-treatment support. Hydrating serums with simple ingredient profiles are generally a better fit than anything exfoliating or highly active.
Avoid retinoids, strong acids, vitamin C formulas that sting, harsh toners, fragranced products, and peel solutions right before and after your session. These can create unnecessary irritation when your skin is more permeable than usual.
For the first day or two after treatment, keep the routine minimal. Cleanser, hydration, and barrier-focused support are usually enough. Sunscreen is essential once the skin is ready for daytime protection, because freshly treated skin can be more vulnerable to UV exposure.
What microneedling should feel like
At-home microneedling should feel controlled and tolerable. Some areas are more sensitive than others, especially the forehead and around the mouth, but the sensation should not feel chaotic or sharp in a way that makes you pull away. Most users describe it as prickly with mild warmth afterward.
Your skin should look pink to moderately flushed for a short period after the session. That response can vary based on depth, skin sensitivity, and the area treated. Minimal downtime is one of the main advantages of a well-executed at-home treatment, but that only holds true when the session is appropriate for home use.
If your face is extremely inflamed, swollen beyond mild temporary puffiness, or uncomfortable well past the expected recovery window, your protocol is likely too aggressive.
How often to microneedle at home
Frequency depends on needle depth, skin tolerance, and what you are trying to improve. A light cosmetic session focused on radiance and product absorption can be done more often than a deeper session targeting texture or the look of old acne marks.
This is where patience matters. Skin remodeling takes time. You are not looking for overnight transformation. You are building cumulative results through safe repetition. For many users, spacing sessions out appropriately leads to better outcomes than treating too often and constantly resetting the skin into irritation.
If you are unsure, give your skin more recovery time, not less. A calm skin barrier is part of good results.
Common mistakes that hold back results
The most common mistake is overdoing the treatment. That can mean too much depth, too much pressure, too many passes, or sessions that are too frequent. More intensity does not guarantee better rejuvenation. It often just increases downtime and the chance of irritation.
The second mistake is poor hygiene. Reusing cartridges, touching the skin with unclean hands, or treating skin that was not cleansed properly can compromise the whole session. Single-use cartridges and careful prep are non-negotiable if you want a treatment that feels professional and reliable.
Another issue is using the wrong skincare after microneedling. Many people sabotage their results with acids, retinol, or active-heavy routines too soon. If the skin is trying to recover, keep the environment supportive.
Finally, many people expect one treatment to do everything. Microneedling works best as a series, especially for concerns like texture irregularities and post-acne marks.
When at-home microneedling is a good fit – and when it isn’t
At-home microneedling is a strong option for adults who want more control over their skincare routine and visible improvement without the clinic schedule or clinic price. It can make a lot of sense if your goals are smoother-looking skin, better absorption of skincare, softening the appearance of fine lines, and gradual texture refinement.
It may not be the right move if you have highly reactive skin, active inflammatory acne, open lesions, certain medical skin conditions, or a tendency to develop post-inflammatory pigmentation easily. If your concern is severe scarring or a more complex skin issue, professional guidance is the safer route.
That is why device choice and cartridge quality matter. A reliable pen with adjustable settings, authentic components, and clear treatment control gives you a much better chance of consistent, skin-safe results. That is also why many shoppers look for official sources like Dr. Pen when they are ready to invest in an at-home system they can use with confidence.
The real goal: consistency, not intensity
The people who get the best results from microneedling at home are usually not the ones doing the most. They are the ones doing it correctly. Clean technique, the right cartridge, a realistic depth setting, and smart aftercare will take you further than an overly aggressive session ever will.
Treat your skin like it is responding to a precision tool, because it is. Give it a reason to repair well, and over time, it usually shows you the difference.