microneedling pen at home
Achieving glowing, youthful, and resilient skin no longer requires scheduling weekly, expensive trips to a dermatology clinic. Over the past few years, the skincare world has experienced a massive shift, allowing everyday enthusiasts to take their beauty routines into their own hands. If you have been searching for a scientifically proven method to rejuvenate your complexion from the comfort of your bathroom, investing in a high-quality microneedling pen might be the ultimate game-changer for your regimen.
Often referred to as at-home collagen induction therapy, this innovative practice relies on your body’s natural healing cascade to smooth, tighten, and transform your skin. But before you dive into the world of at-home aesthetics, it is crucial to understand the tools, the techniques, and the science behind the glow.

What is a Microneedling Pen?
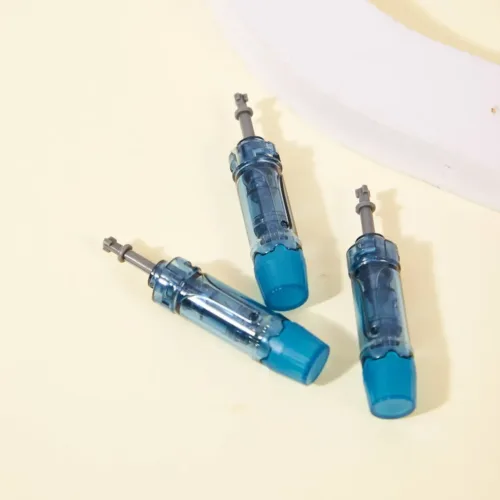
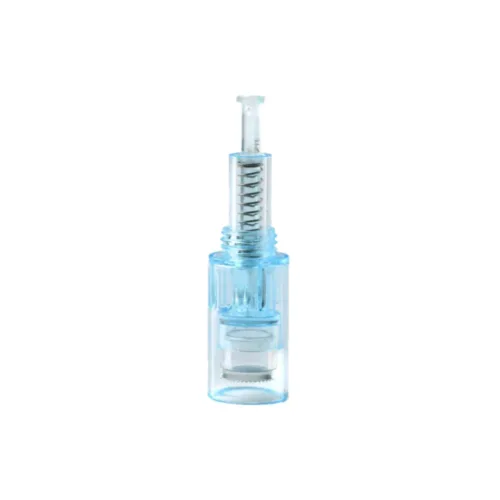
A microneedling device is a handheld, motorized tool equipped with a sterile cartridge of ultra-fine needles. When turned on, the tip oscillates at incredibly high speeds, stamping the skin vertically. This rapid stamping creates thousands of microscopic, controlled micro-injuries in the epidermis and dermis. These invisible punctures trick your brain into thinking your skin has been wounded, prompting an immediate rush of blood flow, collagen, and elastin to the “injured” site.
Today’s technology has made the microneedling procedure easier than ever. For instance, using a wireless microneedling pen allows for complete freedom of movement without the hassle of tangled cords, ensuring you can reach difficult angles around the nose and jawline with maximum precision.
The Pen vs. The Roller: Why the Upgrade?
If you have dabbled in at-home skin treatments before, you might be familiar with dermal rollers. However, when comparing microneedling vs dermarolling, the pen is universally recognized by skincare professionals as the superior, safer choice.
Dermal rollers feature needles on a cylindrical wheel. As you roll it across your face, the needles enter the skin at an angle and exit at an angle, creating a “V” shaped tear. This dragging motion can cause unnecessary micro-tears, leading to prolonged recovery times and potential scarring. A motorized pen, on the other hand, operates with a precise, vertical up-and-down motion. This creates clean, direct micro-channels that heal efficiently and safely.
Transformative Microneedling Benefits
The sheer versatility of a microneedling pen makes it a staple for addressing a wide variety of dermatological concerns. The core microneedling benefits include:
- Anti-Aging: By boosting collagen production, the treatment naturally plumps the skin, smoothing out fine lines, crow’s feet, and deep-set wrinkles.
- Texture and Tone: Regular facial microneedling refines enlarged pores and drastically improves overall skin texture, leaving behind a glass-like finish.
- Pigmentation: When treating hyperpigmentation with micro-needling, the rapid cell turnover helps break up melanin clusters, fading sun spots, melasma, and post-inflammatory erythema.
- Body Treatments: The benefits aren’t limited to the face. The pen is highly effective at reducing appearance of deep stretch marks on the stomach, thighs, and hips when used consistently over several months.

Professional Treatment Versus Home Device
It is important to set realistic expectations when starting your journey. When evaluating a professional treatment versus home device, the primary difference lies in needle depth and the environment. Dermatologists often use medical-grade devices that reach depths of up to 3.0mm to target severe scarring and deep wrinkles, accompanied by prescription-grade anesthetics.
An at-home pen typically operates safely between depths of 0.25mm and 1.5mm. While shallower, at-home treatments are highly effective for cosmetic maintenance, product absorption, and gradual collagen building. Over time, consistent at-home sessions can yield results that rival expensive clinic packages, provided you follow strict safety protocols.
Pre-Treatment: Setting Up for Success
Safety and hygiene are non-negotiable. Because you are breaking the skin barrier, a sterile environment is vital to prevent infections.
1. Gather Your Supplies
Always use sterile disposable cartridge needles. Never reuse a cartridge, even if it has only been used on your own face. Reusing needles introduces bacteria and blunt tips, which will damage your skin.
2. Pain Management
While shallow depths (0.25mm) are practically painless, going deeper may cause discomfort. Many users apply an over-the-counter numbing cream for topical pain relief containing 4% to 5% lidocaine. Apply this 20 to 30 minutes before your session, and critically, wash it off completely before you begin needling to avoid pushing the cream into your bloodstream.
3. Cleanse and Prep
Properly preparing skin for micro-channeling involves double-cleansing your face to remove all makeup, dirt, and oils. Follow up by swabbing your skin with 70% isopropyl alcohol to sanitize the treatment area completely.
4. The Essential Slip
You must never use a microneedling pen on dry skin. You require a pure, high-molecular-weight hyaluronic acid serum for glide. This provides a slippery surface, preventing the pen from dragging or scratching. Avoid using serums with active ingredients (like vitamin C or retinol) during the procedure, as pushing these deep into the dermis can cause severe irritation.

Mastering Needle Depths
One of the greatest advantages of a motorized pen is the adjustable needle length for different skin areas. Your facial skin varies wildly in thickness; the skin on your forehead is remarkably thin, while your cheeks are much plumper.
- Forehead and Nose (0.25mm – 0.5mm): The skin here is thin and sits directly over bone.
- Cheeks and Chin (0.5mm – 1.0mm): Thicker skin that can tolerate slightly deeper penetration for collagen induction.
- Body and Stretch Marks (1.0mm – 1.5mm): Body skin is tough and requires deeper penetration to break up scar tissue.
A frequently asked question by those suffering from past breakouts is: how deep should needles go for acne scars? For superficial acne scarring, 1.0mm is usually sufficient to break up the tethered scar tissue and trigger remodeling. For deeper icepick or boxcar scars, depths of 1.5mm may be necessary, but extreme caution should be exercised when operating at this depth at home.
Executing the Microneedling Treatment
Once your skin is prepped, numbed, and sanitized, and your hyaluronic acid is applied, it is time to begin.
- Work in Sections: Apply a generous drop of hyaluronic acid to one quadrant of your face (e.g., the right cheek).
- The Glide: Turn on your pen. Hold it perpendicular (at a 90-degree angle) to your skin. Move in smooth, steady motions.
- Cross-Hatching Method: Glide the pen horizontally across the section, then vertically, and finally diagonally. This ensures even coverage and maximum micro-channel creation.
- Repeat: Move systematically across your face—cheeks, chin, forehead, and nose—applying serum for glide as you go.
Post-Treatment: Healing and Aftercare
The true magic of collagen induction happens during the recovery phase. Implementing a strict, step-by-step skin needling aftercare routine ensures optimal healing and brilliant results.
Day 1 (Immediate Aftercare): Your face will likely look and feel like it has a mild sunburn. Do not wash your face for at least 12 hours. Reapply pure hyaluronic acid if your skin feels tight. Avoid any intense sweating, saunas, or direct sunlight.
Day 2 to 3: You can wash your face with a gentle, non-foaming cleanser. Continue to hydrate heavily. You must apply a broad-spectrum mineral sunscreen (SPF 30 or higher) if you go outside, as your skin will be highly photosensitive.
Day 4 to 7: You might notice some mild flaking or dryness; this is completely normal. Resist the urge to pick or exfoliate. Let the dead skin shed naturally. You can slowly reintroduce your normal skincare routine, but wait at least 7 days before applying chemical exfoliants (AHA/BHA) or retinoids.
Regarding skin barrier recovery time, the micro-channels close within a few hours, but the deeper barrier repair takes roughly 48 to 72 hours. Treating your skin like delicate silk during this window is imperative.

Understanding Potential Side Effects
When done correctly, at-home treatments are incredibly safe. However, being aware of the side effects of at-home skin needling helps you distinguish between normal healing and signs of trouble. Normal side effects include mild to moderate erythema (redness), a sensation of heat, temporary tightness, and mild peeling.
Abnormal side effects include prolonged swelling, blistering, or signs of infection (like pus or severe throbbing). These are almost entirely avoidable by strictly adhering to sanitary guidelines and never sharing or reusing needles.
Frequency and Results: The Road to Glowing Skin
Patience is a virtue in skincare. A common mistake beginners make is over-treating the skin, thinking “more is better.” So, how often to use skin needling device?
The frequency depends entirely on the needle depth:
- 0.25mm (Cosmetic/Serum Absorption): Can be done once every 1 to 2 weeks.
- 0.5mm (Mild Collagen Induction): Can be done once every 3 to 4 weeks.
- 1.0mm to 1.5mm (Deep Scarring/Stretch Marks): Should only be done once every 4 to 6 weeks to allow the body a full skin cycle to generate new collagen.
Visible microneedling results are a gradual process. While you will likely notice a plump, hydrated glow within the first week, genuine structural changes—such as the fading of scars and the smoothing of wrinkles—take time. The collagen production cycle takes about four to six weeks to mature, meaning the results of your treatment today will look their absolute best roughly a month from now.
Final Thoughts
Stepping into the world of aesthetic home care with a microneedling pen is incredibly rewarding. By investing in a high-quality device, educating yourself on proper depths, and maintaining flawless hygiene, you unlock a powerful, scientifically-backed mechanism for skin rejuvenation. Whether your goal is erasing a decade of sun damage, refining your overall texture, or simply maintaining a youthful bounce, this handheld tool provides the power of a clinic directly to your fingertips. Take it slow, respect your skin barrier, and get ready to reveal your most radiant complexion yet.