A microneedling session can go off track before it even starts if the cartridge is the wrong fit, not secured correctly, or reused when it should be replaced. This dr pen cartridge replacement guide is here to make that part simple. If you want clean application, reliable needle performance, and skin-safe treatment at home, cartridge replacement is not a small detail – it is part of the result.
Why cartridge replacement matters more than people think
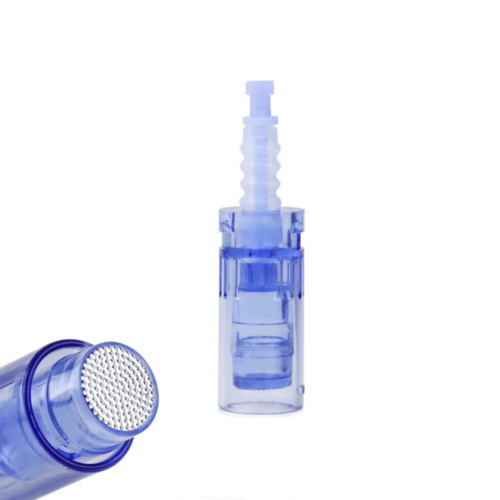
The cartridge is the part that touches your skin directly, so it affects both safety and performance. A fresh, properly installed cartridge helps support even needle movement, better product application, and a more controlled treatment experience. When a cartridge is damaged, loose, or previously used, you are no longer working with the device the way it was designed to perform.
For at-home microneedling users, this is where good habits matter. Even the best pen cannot deliver consistent results if the cartridge is compromised. Single-use, disinfected cartridges are meant to give you a clean start every time, which is especially important when treating concerns like texture, acne scars, fine lines, and uneven tone.
The first step in any Dr Pen cartridge replacement guide – match the model correctly
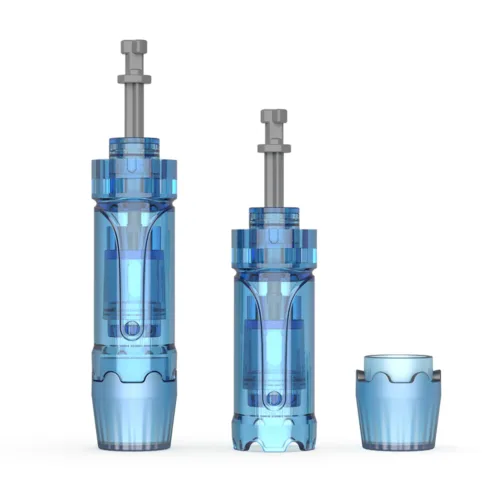
Before you replace anything, confirm that the cartridge is made for your exact pen model. This is the step many users rush, and it is usually where problems begin. Dr. Pen devices are built in multiple families, including models like the A20, M8, M8S, A11, and Q2, and those cartridges are not universally interchangeable.
A cartridge that looks close enough is not good enough. The fit has to be exact for the connection to lock correctly and for the needle mechanism to operate as intended. If the cartridge feels forced, wobbly, or misaligned, stop there. Using the wrong cartridge can affect needle stability and create an uneven treatment.
If you own more than one device, it helps to store cartridges separately by model. That small bit of organization prevents mix-ups, especially when packaging looks similar.
How to replace a cartridge safely
Start with clean hands and a clean setup. Place your pen, sealed cartridge, and any topical products on a disinfected surface. Make sure the device is powered off before handling the tip.
Remove the old cartridge by twisting or unlocking it according to your pen’s design. Most Dr. Pen devices use a simple lock-in mechanism, but the motion can vary slightly by model. Do not yank the cartridge straight out if it is designed to twist free first. A gentle, controlled removal protects the connection point on the pen.
Once the used cartridge is off, inspect the front of the device. You want the connection area to be clean, dry, and free from residue. If there is visible buildup from serum or treatment fluid, clean it carefully before attaching a new cartridge. Moisture or debris at the connection point can interfere with proper installation.
Next, open the new cartridge package only when you are ready to use it. Check that the sterile packaging is intact. If the seal is broken, the cartridge should not be used.
Align the cartridge with the pen opening and attach it using the correct motion for your model, usually a push-and-twist lock. It should sit securely without wobbling. If it feels loose, remove it and try again. Never force the cartridge into place.
After it is attached, turn on the device briefly and test the movement at a low speed. The needle action should look smooth and even. If the motion seems irregular or the cartridge is not seated properly, power off the pen and reinstall it.
Signs your cartridge needs replacing immediately
In most cases, replacement is simple because cartridges are designed for single use. That means after one session, the cartridge should be discarded. There are also times when a cartridge needs to be replaced before treatment even begins.
If the packaging is damaged, the needles look bent, the tip is cracked, or the cartridge does not lock securely, do not use it. The same goes for any cartridge that has been dropped onto an unclean surface after opening. With microneedling, there is not much room for guesswork. If something looks off, replace it.
Users sometimes ask whether a cartridge can be reused on the same person if it still looks clean. The safer answer is no. Needle sharpness, hygiene, and consistent performance all decline after use. Reusing a disposable cartridge can increase skin irritation and reduce treatment quality.
Common replacement mistakes that affect results
The most common mistake is buying by appearance instead of compatibility. Two cartridges can seem nearly identical and still fit differently enough to create instability. That matters more than people expect because microneedling depends on precision.
Another issue is attaching the cartridge in a hurry. If it is only partially locked, the pen may still turn on, but the treatment can feel uneven or less controlled. That does not always mean the device is faulty. Sometimes it is just an installation issue.
There is also the temptation to open multiple cartridges at once while setting up. That is not ideal. Keep each cartridge sealed until the exact moment you need it. This supports hygiene and reduces the chance of accidental contamination.
Finally, some users forget to inspect the pen connection itself. If serum has dried around the attachment area, a brand-new cartridge may still fit poorly. A quick check before every session can prevent that problem.
Storage and handling between sessions
Replacement is only one part of cartridge safety. Storage matters too. Keep unopened cartridges in a clean, dry place away from heat, humidity, and direct sunlight. Bathroom cabinets are convenient, but they are not always the best environment if moisture levels run high.
Leave cartridges in their original packaging until use. Loose storage increases the chance of damage, contamination, or confusion between models. If you keep extra supplies on hand, label them clearly by device family and needle configuration.
It also helps to check your inventory before your next treatment date. Running out at the last minute can lead people to improvise with older supplies, and that is exactly what you want to avoid.
Choosing the right cartridge type for your treatment
A good dr pen cartridge replacement guide is not only about changing the tip. It is also about choosing the right one for the area you plan to treat. Different cartridge configurations can support different treatment goals, depending on your device and your skin focus.
For broader areas like the cheeks or forehead, users often prefer configurations that allow efficient coverage. For smaller or more delicate zones, precision matters more. The best choice depends on your experience level, the treatment area, and the intensity of the session.
This is where a little restraint pays off. More aggressive is not always better, and a larger needle configuration is not automatically the right choice for every concern. If you are treating sensitive areas or you are newer to microneedling, a more controlled approach is often the better one.
When a cartridge problem is really a device issue
Not every replacement problem comes from the cartridge itself. If you have confirmed model compatibility, installed the cartridge correctly, and still notice irregular operation, the pen may need inspection. Connection wear, impact damage, or improper cleaning can affect how the device holds the cartridge.
The useful rule is simple. If multiple new cartridges fit poorly on the same pen, look at the device. If one cartridge is the only one causing problems, replace that cartridge and move on. This can save time and prevent unnecessary frustration.
Build cartridge replacement into your routine
The easiest way to stay consistent is to treat cartridge replacement as part of session prep, not an afterthought. Confirm compatibility, inspect the seal, attach carefully, test needle movement, and discard after use. That routine takes only a few minutes, but it supports the professional results people want from at-home microneedling.
For many users, confidence comes from repetition. Once you know what a secure fit feels like and what a fresh cartridge should look like, the process becomes second nature. And when your setup is right from the start, your treatment has a much better chance of feeling controlled, clean, and worth the time you put into your skin.
If you want clinic-quality skin without the clinic price, the small details are where that standard begins – and a fresh, correctly matched cartridge is one of the most important ones.