A good microneedling session starts long before the device touches your skin. If you are wondering what to do before microneedling at home, the short answer is this: prepare your skin, your tools, and your environment with the same care you expect from a professional treatment. That prep work is what helps support cleaner treatment, more even results, and less unnecessary irritation.
At-home microneedling can deliver smoother-looking texture, better product absorption, and visible improvement in concerns like fine lines, acne marks, and uneven tone. But results are tied to technique, and technique starts with preparation. Rushing into a session with leftover makeup, active irritation, or the wrong skincare lineup is where many users get into trouble.
What to do before microneedling at home starts days earlier
The biggest mistake first-time users make is thinking prep begins five minutes before treatment. In reality, your skin should be in a calm, stable state before you microneedle. If your barrier is already stressed, even a high-quality device and fresh cartridge can feel too aggressive.
A few days before your session, take a close look at your skin. If you have sunburn, active breakouts in the area you plan to treat, a rash, open cuts, or any sign of irritation, it is better to postpone. Microneedling works best on skin that is intact and relatively balanced. Treating compromised skin can increase redness, sensitivity, and uneven healing.
This is also the time to pause products that can make skin more reactive. That usually includes retinoids, exfoliating acids, and stronger resurfacing treatments. The exact timing depends on your skin tolerance and the formulas you use. Some people need only a short break, while more sensitive skin may need several days. If your skin tends to get red easily, be more conservative.
Review your skincare and avoid the wrong actives
Before microneedling, less is usually better. You want skin to be clean and comfortable, not freshly exfoliated or overloaded with treatment products. Harsh acids, retinol, scrubs, and peeling solutions can leave the barrier more vulnerable than it looks.
This matters because microneedling creates controlled microchannels in the skin. When the barrier is temporarily more open, anything irritating has a greater chance of causing stinging, redness, or a reaction you did not intend. Gentle, fragrance-free basics are the safest route leading up to treatment.
If you are using prescription topicals, it is smart to be cautious and follow professional guidance. Some ingredients are not ideal around a needling session. The goal is not to strip your routine down forever, only to give your skin a short window of calm.
Sanitize your setup like it matters – because it does
The safest at-home treatment space is clean, organized, and simple. You do not need a clinical room, but you do need control over your environment. Set up on a freshly cleaned surface with good lighting and clean hands. Keep pets, towels, and anything dusty away from the treatment area.
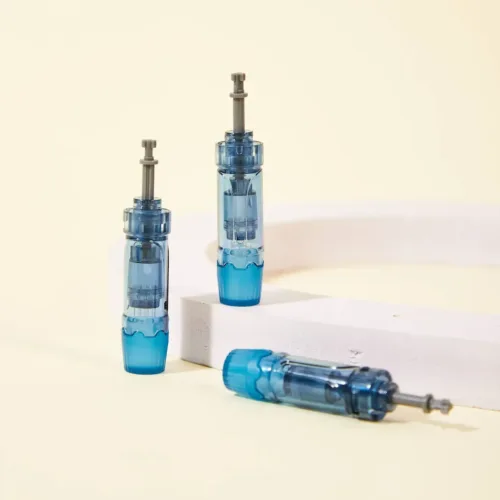
Your device should be fully charged if applicable, wiped down according to manufacturer guidance, and ready before you start. The cartridge should be new, sealed, and single use. That part is non-negotiable. A fresh disposable cartridge helps support skin safety and consistent performance.
Have your essentials within reach before you begin. That usually means gentle cleanser, sterile or skin-safe sanitizing supplies appropriate for the device and your skin prep, clean gauze or pads, and the post-treatment products you plan to use. When everything is ready, you are less likely to interrupt the session or make rushed decisions mid-treatment.
Cleanse thoroughly, but do not overdo it
On treatment day, begin with a thorough cleanse. Remove makeup, sunscreen, oil, and any residue so the skin surface is as clean as possible. A gentle cleanser is usually enough. There is no benefit to using a strong scrub or foaming cleanser that leaves your face tight.
After cleansing, pat the skin dry with a clean towel or disposable towel. Your face should feel clean and comfortable, not squeaky or stripped. If your routine normally includes toner, essence, or active serums, this is not the moment for them unless they are specifically appropriate for use with your treatment plan.
For people asking what to do before microneedling at home if they wear makeup daily, the answer is simple: remove everything carefully and give yourself enough time. Do not treat skin that still has traces of foundation, SPF, or long-wear products around the nose and hairline.
Choose the right needle depth for your goal
Preparation is not only about cleanliness. It is also about choosing settings that match your experience level and skin concern. One reason professional-style devices are so effective is that adjustable needle depth allows more control. That control matters most when you use it responsibly.
Delicate areas and beginner sessions call for a more conservative approach. Deeper is not automatically better, especially at home. The right depth depends on the area being treated, your skin tolerance, and your specific goals, whether that is improving overall texture, softening the look of acne scars, or supporting firmer-looking skin.
If you are new to microneedling, start with a cautious plan rather than pushing for the most dramatic session possible. Professional results come from consistency, not overworking the skin in one treatment. Many users see better long-term progress when they respect the learning curve.
Patch test when you are using a new product
Microneedling changes how products interact with your skin, so treatment day is not the day to experiment. If you plan to use a hydrating serum during or after your session, make sure it is one your skin already tolerates well. A patch test is a smart step whenever a formula is new to you.
Keep your product choices simple. Hydration-focused formulas are generally easier to work with than heavily fragranced, highly active, or multi-acid products. If a serum burns on intact skin, it is not a good candidate around microneedling.
This is one of the most overlooked parts of prep. People spend time choosing the device but not enough time choosing what will go on the skin right after treatment. Clean, calming support products are part of a safer session.
Do not microneedle irritated, inflamed, or recently tanned skin
Skin condition on the day of treatment matters just as much as your equipment. If your face feels hot after sun exposure, if you have active inflammation, or if your barrier is stinging from overuse of actives, reschedule. Waiting a few days is better than pushing through and dealing with prolonged irritation.
This also applies if you recently had another strong treatment. Waxing, peels, aggressive exfoliation, and some in-office procedures can leave skin too sensitized for needling. Better timing usually means better outcomes.
There is always some individual variation here. Resilient skin may bounce back quickly, while reactive skin may need a longer reset. When in doubt, choose the more conservative timeline.
What to do right before microneedling at home
In the final minutes before you begin, wash your hands thoroughly and secure your hair away from the face. Open your cartridge only when you are ready to attach it. Confirm your device settings, make sure the treatment area is clean and dry, and keep your motions deliberate rather than rushed.
Mentally, it helps to treat the session like a protocol, not a casual skincare step. That mindset leads to better decisions. You are more likely to maintain hygiene, follow the right depth, and stop if something feels off.
If you use a professional-style pen such as Dr. Pen, this is where preparation pays off. Authentic devices, fresh model-compatible cartridges, and a controlled setup work together to support more reliable performance and a better at-home experience.
A calm plan gets better results
Microneedling at home is not just about owning the right tool. It is about creating the right conditions for that tool to perform well. Clean skin, a fresh cartridge, a sensible skincare pause, and a treatment plan matched to your skin all make a difference you can see and feel.
The best pre-treatment routine is the one that protects your skin barrier while setting you up for consistent progress. Take the extra time, keep your routine simple, and let preparation do some of the heavy lifting before your session even starts.